Tuesday, July 27, 2010

Italian Cream Cake


This is a recipe I found and have been craving to try but didn't have an occasion to make it. Finally I decided to just go for it :) It turned out so yummy!!!!


Cake Batter:

½ cup Butter, room temperature
½ cup Shortening
2 cups Sugar
5 Large Eggs, Separated
1 cup Buttermilk
1 teaspoon Vanilla
2 cups All-purpose Flour
1 teaspoon Baking Soda
1 teaspoon Salt
1 cup Shredded or Flaked Sweetened Coconut
1 cup Chopped Pecans

Frosting:

1 stick Butter, room temperature
1 package Cream Cheese (8 0z.), room temperature
1 teaspoon Vanilla
1 pound Powdered Sugar
Chopped Pecans (for garnish)

Preheat oven to 325 degrees.


Cake batter: Cream butter, shortening and sugar in a large bowl. Add egg yolks, one at a time, mixing well after each. Add buttermilk and mix well. Add vanilla and mix well.

Sift flour, baking soda and salt together in a medium bowl; add coconut and pecans and toss together well, then stir into wet ingredients. Mix well by hand.

In another bowl, beat egg whites until stiff. Fold gently into cake batter, and then divide batter into 3 greased and floured 8 or 9 inch round cake pans.

Bake 20-25 minutes at 325 degrees, or until lightly browned and cake tests done when a toothpick is inserted near the center (I used a 9 inch pan and had to cook almost 30 minutes). Cool thoroughly on wire racks in pans.

Frosting: Cream butter and cream cheese together in a medium bowl; add vanilla, and gradually add powdered sugar, beating until smooth. You may want to make 1 1/2 batches of frosting if you like to have extra to decorate with.

Carefully remove cakes from pans. Place bottom layer on serving plate, top with frosting. Place second layer over first, top with frosting, then place the last layer. Frost the cake, then sprinkle with chopped pecans as desired.

Keep cake refrigerated.

Wednesday, July 21, 2010

Cinnamon Apple Brunch Bake

This is a very easy recipe that tastes great and is sure to be something new to your guests! It was passed down to me in a recipe book that I received for my wedding.


What you will need (serves 8):

3 tablespoons butter
1/2 cup light brown sugar
1 can (21 oz) apple pie filling
2 teaspoons ground cinnamon
1 1/2 teaspoons vanilla
1 can (12 oz) refrigerated biscuits
1/2 cup chopped nuts (optional)

Melt butter in a medium size bowl. Stir in brown sugar, apple pie filling, cinnamon, and vanilla. Spread half of the apple mixture in a 2 quart shallow baking dish.


Separate biscuits. Cut each into quarters. Arrange pieces, points up, over mixture.


Spoon remaining mixture over biscuits. Sprinkle with nuts (optional - I did not do).


Bake at 350 degrees for 35-40 minutes. Let stand 5 minutes. Serve warm.


It's great with vanilla ice cream!
 

Beans & Rice

Not long after I decided to go 100% vegetarian with my diet I was talking to my dental hygienist who asked me what I do for protein. During our conversation she told me of a meal that she loves. It sounded quick, easy, and up my alley so I tried it. Now it's one of those meals that my husband and I love now and then for variety :)


What you will need: Zatarain's yellow rice, canned black beans, salsa (chunky), shredded cheese (cheddar or blend), and diced grilled chicken (optional - I put this on my husband's).


Cook the rice according to package directions. Spread desired individual amount on microwavable plate.


Rinse the black beans and then warm them in a sauce pan. Spread desired individual amount on top of rice.


Top with diced grilled chicken (optional - I did not do).

Layer salsa on top of beans/chicken.


Cover with cheese.


Cook in microwave on high for 2-4 minutes (until cheese melts).


Salt & pepper to taste and then enjoy!  Can be served with tortilla chips.

**I make this plated since my husband enjoys chicken and I do not. But, you could just cook the rice according to the package directions, then add all your toppings onto the rice (in the 2qt pot it recommends to cook it in), and microwave it as one large dish to serve from.

Butterfly Teacher Gift Idea

My kids have been lucky so far to have great teachers! The work they do with my children reminds me of the journey a caterpillar takes in becoming a butterfly. So I have given this gift to each of them (all female so far) as a reminder of their part in helping my children be successful in their journey.


I have included a card with each that explains the symbolization of the butterfly :) Of course any butterfly item would work (I just love this one).  I figure it's something different than what they usually receive as gifts. They have all loved it!


Now that my daughter is getting older
we are adding a handmade card to the gift!

Tuesday, July 20, 2010

Bruschetta

I have to admit that I never really cared for bruschetta in the past. That is until someone introduced this recipe to me! The lady that gave me this recipe is a world traveler who grew up on (and currently runs) a huge herb farm. I found this recipe to be delicious and easy to make so I thought I would share it!!


What you need: a loaf of fresh French bread, clove of garlic, fresh tomatoes (diced), FRESH basil, olive oil, and sea salt.


Cut thick slices of French bread and place in a toaster oven until light golden brown.


Rub the garlic clove on the toasted bread (be cautious of the amount because overuse will actually seem spicy hot when you eat it).


Top the toast with diced fresh tomatoes.


Top with chopped fresh basil.


Drizzle with olive oil.


Top with sea salt (I use a sea salt grinder). Now it's time to enjoy!
 

Thursday, July 15, 2010

Twist Pasta Salsa Cheese

This is a meal I made often in my single days when I was both working and going to college full time. I seemed to always have the ingredients plus it's quick and easy!! I thought it was a strange meal so I never really introduced it to others - until one day when I finally introduced it to my now husband. Turns out he LOVES it! Now it's a good quick meal for us when no one really wants to cook. It can be used as a side dish or meal on its own.


What you will need: we use tri-color rotini pasta, salsa (something chunky like the one pictured), chopped onion (optional - we prefer red or white), and shredded cheese (cheddar or a blend).


Cook the pasta according to directions. Drain well and place on a microwave safe plate.


Top with onion (optional).


Top with salsa.


Then spread some shredded cheese on top.


Place it in the microwave on high for 2-4 minutes (until cheese melts).


Salt & pepper to taste and you are ready to enjoy!!

Tuesday, July 13, 2010

Teacher Appreciation Cookie Bouquet

My love for cake decorating has really moved into a passion to decorate sugar cookies! It takes time (which is hard to find with two little ones at home) but I always love the end result. My daughter finished her second year of pre-school this past June - the second year with the same teachers. So what do you give when you have already gone through two Christmases, two teacher appreciations, and one end of the year? I decided to give them something that they probably haven't been given before - a cookie bouquet :) I was first inspired by some decorative plant pots and then I let my imagination run. These are sugar cookies with royal icing and wrapped to stay fresh - yes they can be eaten! Plus the planter can be used later.


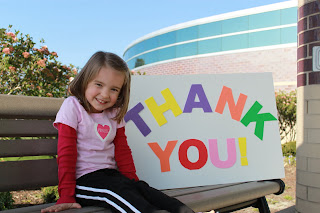
Then I took a picture of my daughter in front of her school with a big sign that said "Thank You". I had that turned into a card (with the picture as a cover) so that we could add a personal note for each teacher.


Everyone loved the bouquets and thought I had spent the $60 plus (for each) that it costs to get them from Cookies by Design!! The overall cost wasn't much but the time to decorate the cookies.... let's just say you have to love doing it :)

Monday, July 12, 2010

Chocolate Peanut Butter Cupcakes

While grocery shopping one day I came across this:


Of course I had to buy it since my sweet tooth was screaming out!! I really had no idea what I was going to do with it until I came across a picture of a chocolate cupcake with peanut butter frosting. From that moment I was on a mission. I played around with some recipes for peanut butter frosting until I discovered something that I loved. Then I went easy on myself for the cupcake mix by just buying a boxed chocolate cake mix. Hey, it wasn't the cake mix that I was looking to perfect ;-)

After mixing the cake/cupcake mix according to the package, I added half the recommended batter to each of the cups. Then I sprinkled 6-8 of the chocolate/peanut butter chips onto the batter. Next I added the remaining recommended batter to each cup and baked it as the box directed. It's really important to not over bake (or under bake) since moist cupcakes are the best!!

For the peanut butter frosting:

1/3 cup peanut butter,
2 cups confectioner/powdered sugar,
2 teaspoons honey,
1 teaspoon vanilla extract,
3 to 4 tablespoons milk (enough to give it the consistency you would like)

Cream peanut butter and sugar until light and fluffy (I used my large mixer because it gets thick). Beat in honey and vanilla. Beat in enough milk to achieve a spreading consistency. It's enough frosting for 1 1/2 dozen cupcakes but I made a double batch since my cake mix was for 24 cupcakes and I generally use a little more frosting when I pipe it on. Then I drizzled melted chocolate on the top.


This is now my most requested "dish to pass" :)

Baking Gift Kit

I LOVE putting together "gift kits". This is a baking gift for a little girl's birthday (age appropriate). Included: mixing bowl, recipe for an easy to create food/dessert (I used a mini brownie with hidden kisses recipe - "Brownie Gems" can be found on my blog under September 2010), all the non-perishable ingredients to make the recipe (brownie mix, kisses, cream cheese frosting, sprinkles to decorate), the pan needed to bake it, measuring spoons/cups, mixing spoons, and of course an apron (I made) in her favorite color.  Instead of making an apron you could buy one and maybe personalize it with an iron on design.

Then I wrapped it all up like a basket (the mixing bowl helped decide how to wrap it). I used a recycled greeting card cover for the name tag.

Friday, July 9, 2010

Cheerful Treat

There aren't many opportunities these days where parents can send baked goods to school that were made at home. I finally had a chance for an end of the year party at my son's school. I wanted to do something cheerful and everyone LOVED them!! They are sugar cookies topped with royal icing :)

Thursday, July 8, 2010

Photo Books


I LOVE taking pictures and when I added kids to the family it seemed to get a little out of control :) The never ending piles of fat photo albums and the time needed to organize the pictures into them seemed relentless! So, one day I decided to use my love for photo books to help reduce the amount of space my pictures were taking. Each birthday I create a photo book (Shutterfly.com is my favorite due to quality and user friendliness) for each of my children reflecting on their past year. The first book starts with ultra sounds and goes through their first birthday. The following years start the day after their birthday and goes through the next birthday. I try to include fun things that we did through the year (parties, vacations, trips to the beach,....) and candid moments that remind me of their personality. I also include scanned artwork, certificates, invitations, announcements.... To make sure I don't miss anything I load pictures onto the photo book site (Shutterfly.com) throughout the year. I specially name folders on that site (ex: Tyler's First Year) so I know what book they belong to after they are loaded. The kids and I love going through their books to remind them of all the fun we had (even if they were too young to remember). I also put them out for others to view during birthday parties and other celebrations that revolve around them. I have even made recipe books and books for 50th (and other) birthday celebrations highlighting an entire life up until that point in time. My favorite (what got me started) are memorial books that I made about special people in our lives that have passed. People that I really want my kids to know even though they may have never met them.